Expert Advice: How to Pack and Hoist a Backpack
Table of Contents
When it comes to backpacking, we all know how important your backpack is. It’s essentially your lifeline.
It’s where you keep your personal belongings, most of them being equipment to help you make it through your trip in a healthy and safe manner. But although that’s important, what’s also important is how you arrange the gear inside the backpack.
Looking for other accessories? Check out these other popular camping gear:
Now, you may be thinking that where your gear is placed inside your backpack doesn’t matter, what’s important is that everything fits. But you’re wrong, the way you pack your backpack will make a huge difference on how you carry your bag and access your bag, thus affecting the way your body reacts.
In this article, we’re going to show you how to pack and hoist a backpack. That way, you’ll be properly prepared before heading on your journey.
Does packing your hiking backpack matter?
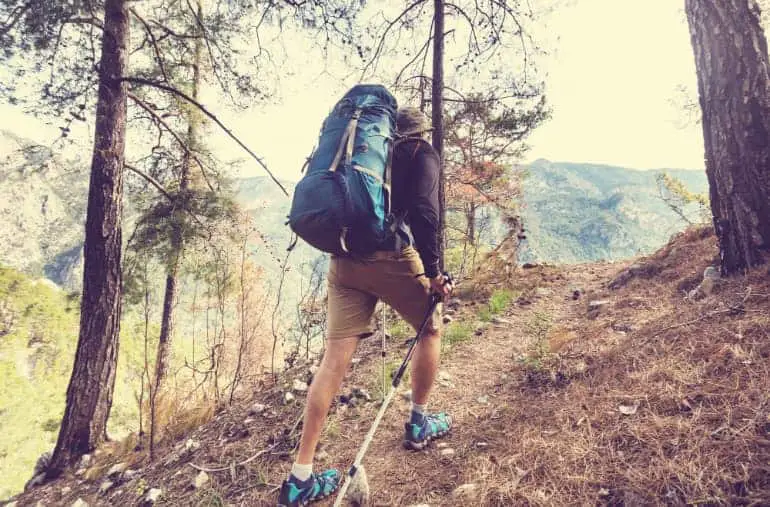
In short, yes. Backpacking is a wonderful way to travel, however, it’s important that you’re properly prepared for the trip. There’s more to backpacking than just carrying some things on your back.
If you’re going to be walking for long distances, your feet and back are going to be carrying the burden of the backpack. This is why it’s essential that you pay attention to how you pack your backpack.
Packing it the right way can make your trip more comfortable and your backpack easier to access during your work.
ABCs of how to pack for backpacking
You want to make the most out of your backpack. What many people don’t realize is that packing your backpack is about balance and comfort rather than the size and style of your backpack.
The ABCs of backpacking are crucial, yet are easy to follow. The ABCs of backpacking are:
- Access
- Balance
- Compression
For more info you can check out this great article from backpacker about packing a backpack.
Access
You want your backpack to be accessible. You don’t want to have it packed perfectly, however, feeling that you’re unable to unpack your backpack.
While packing, you’ll want to ask yourself a couple of questions like ‘What will I need today’? ‘What will I not need?’ By asking yourself these questions, you’re able to visualize your tools and organize the items based on need.
Sleeping items can be kept at the bottom of the backpack while items such as a raincoat, water bottle, sunscreen, and snacks can be kept close up top. That way, you don’t need to waste time digging around your bag.
Balance
Keeping your backpack balanced is essential. If you’re going to be carrying over 25 lbs, you’ll need to make sure the weight is evenly distributed.
You do not want all the weight at the bottom of your backpack nor do you want all your weight at the top of your backpack. So, where do you want the weight?
Well, you want it distributed throughout your backpack. It’s crucial that you place heavy items in the middle of your pack and close to your backpack. If not, you’ll struggle with walking while carrying your backpack.
Balance involves two major factors:
- Internal vs. External Frame
- Weight Distribution
Internal vs. External Frame
When you’re looking for a new backpack, you’re going to be given two options regarding its frame: internal or external frame. The frame of the backpack provides you with the structure of your pack and keeps everything organized within your bag. Without a frame, you’d essentially be carrying a duffle bag.
Internal frames are the most commonly used now in backpacks. An internal frame is built into the backpack, hidden away. Though it creates a slimmer and more comfortable appeal, an internal frame will require you to pack your backpack differently as you’ll need to place heavy items in between your shoulder blades. This will help you support your hips and keep yourself balanced.
External frames are usually found in older models of backpacks. The external frame is placed on the outside of the bag. When it comes to packing your bag, with an external frame you’ll place your heavy items in the center to keep you balanced.
With external frames, it uses the weight to keep you properly balanced.
Weight Distribution
The typical recommendation that you’ll hear for weight is that you should be carrying no more than ⅓ of your body weight. But that doesn’t mean you need to carry ⅓ of your body weight. If you’re more comfortable with less, then carry less.
If you’re following the ABCs of packing, then you’re aware that your soft kit will be at the bottom, bulkier items in the middle and smaller items at the top of your backpack. This is generally a good start for weight distribution, but there are a couple more things you need to know.
Placing your heaviest items near the back panel will aid in keeping your backpack centered, preventing you from tipping over. With that being said, lighter gear should be kept towards the outside panel on the top of your backpack.
Compression
In your backpack, you should leave no breathing room for any of your equipment. You need to use every single space in your backpack to its full capacity.
Any hole or open space you see, make sure you fill it. Compression sacks are ideal for bulkier items such as a sleeping bag and sleeping pad. This will help you decrease the size of the items in your bag, allowing you to fit more into your space.
Is there a right way to pack your backpack?
Now, there’s no right way to pack a backpack as it’ll depend greatly on your backpack and the gear you’d like to pack. You’ll need to figure out the right way to pack your backpack through trial and error.
Ideally, you’ll need to lay out all your equipment in front of you and test out the different ways to load your backpack. Eventually, you’ll find a way which will suit you and your backpack.
Now, though there’s no right way to pack your backpack, the way to find out if a load is sitting properly is whether your backpack is feeling balanced. A well-balanced backpack will sit on your hips evenly and will not shift from side-to-side while you’re hiking.
Although there’s no right way to pack your backpack, there are general guidelines you can follow. Typically speaking, a backpack is divided into three zones, with exterior storage included as well:
Bottom zone
The ideal zone for bulky gear and items that you won’t need until you’re setting up camp.
Core zone
The ideal zone for dense and heavy items.
Top zone
The ideal zone for essentials that are bulkier that you may need while on the trail.
Storage pockets
The ideal zone for when you’re needing essentials immediately.
Tool loops and lash-on points
The ideal zone for long or oversized items.
When you’re loading a backpack, you want to think about it as if you’re packing rows into the backpack. Your goal is to fill all nooks and crannies until your backpack is completely solid.
When packing, also make sure that you have the backpack balanced on each side. If not, you’ll injure your back and feet. In addition, use your compression straps which will prevent your backpack from shifting from side-to-side.
Bottom Pack Zone
You’re going to be carrying bulky items that you’ll be needing for camp. However, this also means that you won’t need these items until the end of the day. Some of these bulky items include:
- Sleeping bag
- Sleeping pad
- Layered clothing
- Camp shoes
Though a sleeping bag and sleeping pad may be soft and malleable, you’ll want to keep these items at the bottom of your backpack as they’ll act as a layer of shock-absorption for both you and your pack.
This helps you prevent yourself from having to dig through your bag in order to find your water bottle or snack. However, it also helps to protect yourself if you happen to fall.
Core Pack Zone
For heavy gear that you won’t be needing during your hike, it’ll include:
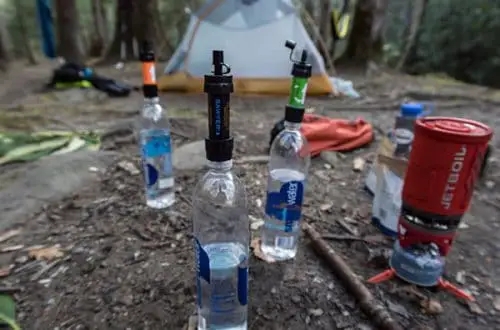
- Stove
- Water filtration system
- Bear canister (which will contain all the food and scented items you’ll be taking with you on your trip)
- Cook kit
- Food stash (meals, not snacks)
By packing heavy items in the core zone, it’ll aid to provide your backpack with a centre of gravity and will push the load down rather than out. If you place this gear too low, it’ll cause your bag to sag. However, placed too high and it’ll make you feel that the backpack will tip over.
Now, if you’re carrying liquid such as liquid fuel, you’ll want to make sure that the fuel cap is tightly locked on top. To ensure the safety of liquid items, you can wrap them in bulky items to help fill in the gaps. You can use a rainfly, tent footprint or tent body to wrap the items in.
Top Pack Zone
The top zone will be used to store trail essentials that you’ll be needing on your hike. If you need a quick snack or need to add another layer, you’ll want to keep these on top of your backpack. These items include:
- Rain jacket
- Toilet supplies
- Insulated jacket
- First-aid kit
- Water filter
- Fleece pants and jacket
There are some backpackers who also stash their tent at the top of their hiking backpack if they’re expecting harsh weather conditions. That way, you can set up camp easily.
Storage Pockets

Now, what you pack in your storage pockets will depend greatly on what you need and what you’re offered. Every company offers different storage pockets such as front pockets, hip belt pockets, side pockets, and lid pockets. Some pockets are larger than the others while some are also in the interior of your backpack. In these pockets, you’ll be able to carry small essentials such as:
- Lip balm
- GPS
- Compass
- Sunscreen
- Map
- Sunglasses
- Raincover
- Bug spray
- Headlamp
- ID
- Car keys
- Cash
A general rule to follow is that if you’re going to be using anything twice a day then you should keep them in the storage pockets.
Tool Loops and Lash-on Pockets
Now aside from the storage pockets, there are some other gear you’ll be wanting to have hanging on the outside of your backpack. These items include:
- Climbing ropes
- Ice axe
- Tent poles
- Trekking poles
- Crampons
- Camp stool
- Large sleeping pad
The equipment listed above is generally for more experienced hikers. Depending on the type of hiking you’re going to be doing, some backpacks have special loops and storage solutions.
If your gear doesn’t have an area for this type of storage, you can use lash patches, daisy chains, and compression straps to manage gear that can’t be carried on your backpack. Though, in this case, you should stay away from doing this as it opens you up to your backpack being snagged on branches and twigs.
Backpacking guidelines
Now, you may be thinking about what type of backpack you need during your trip as this will give you an idea of how much you need to pack. Here are some of the basic guidelines which can help you when choosing the right backpack.

| Length of Trip | Pack Volume in Litres |
|---|---|
| A single stay or overnight (1 to 2 nights) | 20 – 50 |
| Weekend (2 to 2 nights) | 50 – 60 |
| Multi-day (2 to 5 nights) | 60 – 80 |
| Extended (5+ nights) | 80+ |
When packing your backpacking and choosing items, it’s important that you know the type of backpack you need. This will make sure that you’re comfortable with your backpack on your back. Choose the backpack accordingly in order to make your hike a pleasant one.
The table above should be followed by beginner hikers, hikers with a lot of equipment or hikers with children.
A daypack will typically range between 20 to 35 litres, however, this depends on the design and brand. You could even pack a smaller sling bag like the patagonia atom sling as a smaller day bag. In addition, the size of the backpack you select will depend on the type of hiking you’ll be doing. Some backpacks will allow you to carry extra items, for example.
What about experienced backpackers? Don’t worry, we didn’t forget about you. The table below is for backpackers who are more experienced and are educated to economize.
| Length of Trip | Pack Volume in Litres |
|---|---|
| A single stay or overnight (1 to 2 nights) | 20 – 30 |
| Weekend (2 to 2 nights) | 30 – 50 |
| Multi-day (2 to 5 nights) | 45 – 55 |
| Extended (5+ nights) | 55+ |
Essential Items to Add to Your Backpack
You know how to pack for backpacking but do you know the essentials that you should bring with you. A backpacking checklist is crucial when you’re preparing for your journey. This will make sure that you’re not forgetting anything important.
Sun Protection
When you’re backpacking, you’re vulnerable to the natural elements, including the sun. Even when it’s cloudy, you need to make sure that you’re protected so that you won’t get burned. These items include:
- Sunscreen
- Sunglasses
- Lip balm
Insulation
Weather, regardless of the season, can change. And when change does come, it comes quickly. Thus, you need to stay warm and properly insulated with items such as:
- Jacket
- Vest
- Gloves
- Hat
- Pants
Nutrition
What you eat on your trip will determine the outcome of your trip. If you’re not properly fed with the right nutrition, you’ll be cranky and tired. However, with the right food, you’ll be able to feel energetic and ready to take on whatever comes your way.
Navigation
You need to keep yourself safe and reachable. This means you need to carry the proper navigation tools necessary to keep you safe while you’re backpacking. For navigation, you’ll need to have these items:
- Map
- GPS
- Compass
- Altimeter (if you’re going to be mountaineering)
Fire
Without fire, you’re going to have some very cold nights. Fire is essential when you’re backpacking. In order to have fire you need these items:
- Matches
- Waterproof lighter
- Fire starter (for emergency survival fire)
Emergency shelter
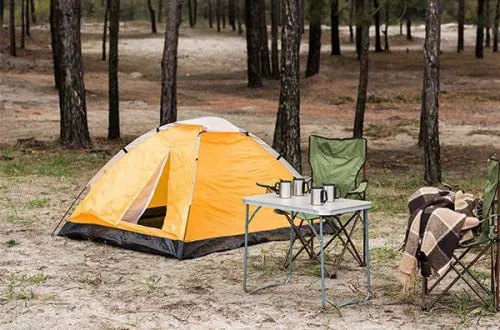
When harsh weather conditions come your way, you need to seek shelter quickly. You should always carry some emergency shelter equipment with you. These items include:
- Tarp
- Tent
- Bivy
- Reflective blanket
Illumination
Light is very important when you’re out in the wilderness. If not, you’ll be in complete darkness during the evenings. Make sure you include these items in your bag:
- Headlamp
- Flashlight
- Extra batteries
Repair kit
Sometimes you trip and snag a tear in your backpack or have harsh weather come and make a hole in your tent. In order to make quick repairs, you need these items:
- Knife
- Flashlight
- Repair kits for stove and mattress
- Duct tape
First-aid kit
Accidents can happen which means you need to be prepared. Though nothing may happen, you need to have a first aid kit with you. In your first-aid kit should have these items:
- Trauma pads
- Bandages
- Medications for allergic reactions, pain, fever, inflammation, and diarrhea
- Shears
- Antiseptic wipes
- Bandages for blisters
Hydration
Of course, we all know how important hydration is when you’re out in the wild. You need to take a couple of different water sources with you, just in case. These items include:
- Water bottles
- Hydration reservoirs
- Water filter or other treatment systems
What to keep in mind while packing
When you’re packing, you’re probably going through your checklist, making sure everything you have is there which is great. However, there are some things you should keep in mind while packing in order to ease the experience.
You don’t always need a stuff sack
Items such as your sleeping pad and sleeping bag are going to come with stuff sacks. Which is a nice feature as it’ll keep things organized, however, if you’re needing space then you’ll want to ditch the stuff sacks as they take up unnecessary space.
Always think about balance
If you want a comfortable backpacking trip, you need to make sure your backpack is balanced. If not, you’re going to be experiencing unnecessary pain. Make sure that you don’t put heavier items on one side of the backpack and instead you evenly distribute them.
Pack tightly and neatly
You cannot be unorganized when you’re backpacking. If anything, you need to be on top of your game. Make sure your backpack is properly organized with everything in its place. It’s easy to throw things around in your backpack but you need to be disciplined with this and make sure everything is neat and tidy.
Go lightweight
Thanks to technology, you now can find ultralight weight or lightweight items which are just as durable and efficient as traditional backpacking gear.
If you want to shave off a couple og grams here and there, then look for lightweight gear. Focus on finding lightweight gear for sleeping bags and the backpack itself.
Less is always more
This phrase can be applied to literally everything because it’s true. When it comes to backpacking, less is more. You don’t need your alarm clock or a photo album of your family. When you’re packing, you need to think about the essentials.
Now, this is going to be challenging if it’s your first time backpacking. But once you experience carrying a heavy load on your back, you’ll quickly understand what we mean.
To avoid carrying more items than necessary, spread out all your items in front of you prior to packing. That way, you have a better visual of what you’re going to be bringing along with you.
Make sure you can easily access your most needed equipment
When you need something immediately, you cannot waste your time putting your bag down, opening it up and rummaging through the entire bag. No, that’s not what you need.
Instead, what you need is your backpack to be easily accessible. Keep items such as snacks, water, and your camera in pockets which are easily accessible without having to remove your backpack.
Tips on picking the best backpacking gear
The good thing about camping equipment is that they’re extremely lightweight now. This means you’ll be able to load your backpack with the essential supplies without having to feel like you’re carrying your entire home on your back.
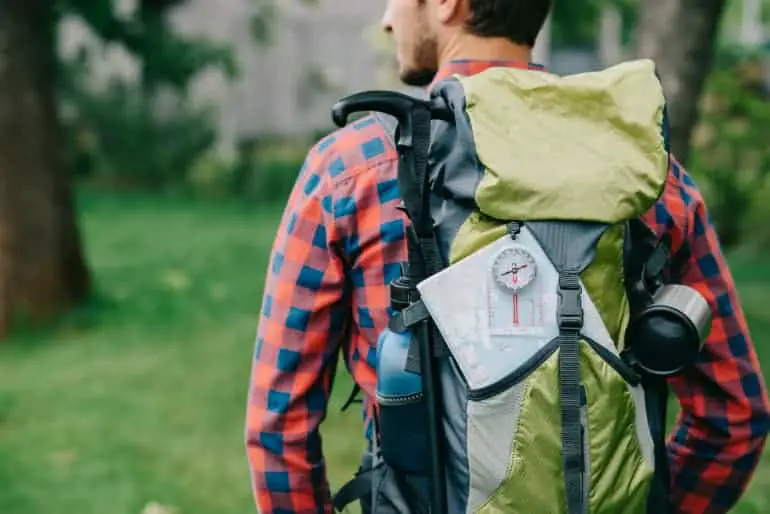
Backpack anatomy
Before you start packing your backpack, you need to know the anatomy of a backpack. Yes, you know the zones inside the backpack, but do you know some of the features that’ll help you with packing and hoisting your backpack? These features are essential as they’ll help you to carry your items comfortably.
Load Lifter Straps
These straps are designed to help keep your backpack firmly on your back. That way, it’s not swaying from side-to-side causing instability. These straps can be adjusted for a customized fit.
Sternum Strap
This is a clip which reaches over your chest and connects to the shoulder straps on the front of your backpack. They’re extremely important for stability. You can also adjust the straps for a more customized fit.
Framesheets
A framesheet aims to help keep the shape of the backpack. It also works to protect the backpacker from being poked with sharp objects from inside of the backpack.
Hip belt stabilizer
This is a strap which is tightened around the hips for extra support and comfort.
Compression straps
If you need more space, these straps are located on the sides of your backpack and provide you with more space by allowing you to compress your backpack.
How not to hoist your backpack
Before we show you how to hoist your backpack, there are some things you must not do when hoisting your backpack. There are many ways to hoist a backpack which seem tempting, however, they can be extremely harmful to your back. So, before you learn the right way to hoist a backpack, you need to know what to avoid.
Hoisting your loaded backpack
Once you’ve figured out how to pack your backpack properly, now here comes the next step which is putting on your backpack. You probably didn’t think about it until now, but you have a fully loaded backpack that you need to get on your back.
Though you think you just need to pick up the backpack, there is a specific process in order to get your backpack on your back in a safe manner. If you ignore these instructions, it can damage your equipment but more importantly injure yourself as well. Here’s how to hoist your backpack safely.
Before you buy a backpack
You now know everything there is to know about how to pack and hoist a backpack. If you need to go out and buy a backpack, there are some features that you should be looking out for so that you’re not overwhelmed when trying to find the best backpack for you.
Lockable Zippers
As a security feature, make sure that your compartments come with two zippers so that you can easily lock them.
Water-resistant material
When it comes out the wild outdoors, you need to be prepared for all the elements. Even though you may be backpacking during the summer, that doesn’t mean you’re free from the rain. You never know what the weather will be like, thus, it’s best if you prepare for harsh weather conditions. Make sure that the materials in your backpack are water-resistant or waterproof. That way, everything in your bag stays dry.
Internal frame
Most backpacks have built-in support rods and frames, however, you can still find some backpacks with an external frame as well. Internal frames are better since they’re hidden, making the backpack slimmer and easier to carry.
Multiple compartments
You want your backpack to have more than enough storage compartments. When it comes to backpacks, you can never get enough storage. With storage compartments, you can properly organize your backpack and have specific items in specific places.
Padded hip belt
When it comes to backpacking, the weight of your backpack is going to be mostly sitting on your hips and waist. Therefore, you want to make sure that the hip belt is padded for extra protection and comfort. That way, regardless of the weight, you’ll be able to walk comfortably.
Now, after reading this guide, you may be thinking that packing your backpack is a lot of work.
If you’re a first-time beginner, then it may seem overwhelming, however, once you get the hang of it, it’s a breeze. You simply need to figure out what tools you need for your hike which you’ll learn through trial and error.
Once you select the right backpack, you’re one step closer to packing your bag. Make sure you lay your items out in front of you, seeing exactly what you’re taking with you and ticking it off of the checklist.
Then, when packing, make sure every inch of space if properly used. If you follow closely the ABCs of packing and pay attention to how you should hoist your backpack, you’ll be well on your way to having a successful journey. Now buckle up and get walking!